Pork back ribs, also known as baby back ribs, are a popular cut of pork that comes from the loin area of the pig. These ribs are shorter and slightly more curved than spare ribs, with a higher meat-to-bone ratio. They are renowned for their tender, flavourful meat that clings to the bone.
Pork back ribs are taken from the area of the rib cage closest to the spine, specifically from the loin muscle that runs along the back of the pig. This muscle is relatively tender and lean, resulting in ribs that are meatier and more tender than other rib cuts.
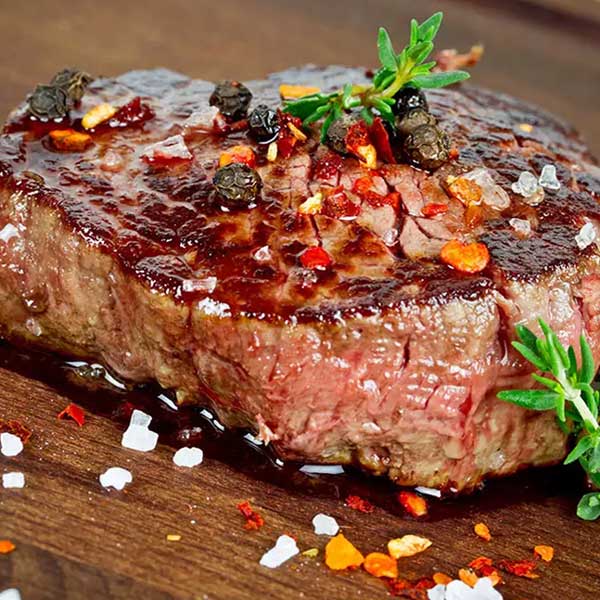
These ribs have a distinctive curved shape and are often characterized by a thin layer of meat on top of the bones. The meat is well-marbled with fat, which adds moisture and flavour during cooking. Pork back ribs are known for their rich, savoury taste and their ability to absorb marinades and dry rubs, making them a versatile choice for various cooking methods, including grilling, smoking, and baking.
Duroc Pigs: The Perfect Breed for Succulent Pork Back Ribs
Duroc pigs are renowned for their exceptional meat quality, making them the ideal breed for producing the most flavourful and tender pork back ribs. These pigs, with their distinctive reddish-brown colour, have become a popular choice among farmers and pork enthusiasts in Ontario, Canada.
The Duroc breed boasts several unique characteristics that contribute to its suitability for pork back rib production. Their well-marbled meat is packed with flavour and juiciness, ensuring that every bite of the ribs is a delightful explosion of savoury goodness. Additionally, Duroc pigs are known for their efficient feed conversion, which translates into a more sustainable and cost-effective farming practice.
In Ontario, Duroc pigs have gained significant popularity due to the region’s commitment to high-quality pork production. The province’s temperate climate and rich agricultural landscape provide an ideal environment for raising these exceptional pigs. Local farmers take pride in their Duroc herds, carefully nurturing them to ensure the best possible meat quality.
Pork back ribs from Duroc pigs are a true delicacy, celebrated by chefs and home cooks alike. Their superior flavour profile and tenderness make them a sought-after ingredient in a variety of dishes, from classic barbecue ribs to more innovative culinary creations. Whether slow-smoked, grilled, or oven-roasted, these ribs are sure to impress even the most discerning palates.
Nutritional Value of Pork Back Ribs
Pork back ribs are a flavourful and popular cut of meat, but it’s essential to understand their nutritional profile and potential health implications. While they can be a part of a balanced diet, moderation is key.
Pork back ribs are a good source of several essential vitamins and minerals. They are rich in thiamine (vitamin B1), niacin (vitamin B3), vitamin B6, and phosphorus. These nutrients play vital roles in energy metabolism, nerve function, and bone health.
Pork back ribs also contain zinc, an essential mineral involved in immune function, wound healing, and protein synthesis. However, it’s important to note that the bioavailability of zinc from animal sources like pork may be lower than that from plant-based sources.
Overall, pork back ribs can be enjoyed as part of a balanced diet, but it’s essential to be mindful of portion sizes and to balance their consumption with other nutrient-rich foods. Moderation is key when it comes to high-fat and high-sodium foods like pork back ribs.
Different Methods for Preparing and Cooking Pork Back Ribs
Dry Rub Method
The dry rub method is a popular way to prepare pork back ribs. It involves coating the ribs with a blend of dry spices and herbs, often including brown sugar, paprika, chili powder, garlic powder, and other seasonings. This creates a flavourful crust on the ribs as they cook. The ribs can be baked, grilled, or smoked low and slow until the meat is tender and falls off the bone.
Wet Marinade Method
Another common method is to marinate the ribs in a wet mixture of liquids and spices before cooking. This could involve ingredients like apple cider vinegar, mustard, Worcestershire sauce, soy sauce, and various herbs and spices. The marinade helps tenderize the meat and infuse it with flavours. After marinating for several hours or overnight, the ribs can be baked, grilled, or smoked.
Braising Method
Braising is a technique that involves searing the ribs on the stovetop or grill to create a crispy exterior, then finishing the cooking process in a covered pot or Dutch oven with liquid like broth, beer, or barbecue sauce. This low and slow cooking method results in incredibly tender, fall-off-the-bone ribs with a rich, flavourful sauce.
Smoking Method
Smoking is a classic way to cook pork back ribs, imparting a unique smoky flavour and tender texture. The ribs are seasoned with a dry rub or marinade, then smoked for several hours over wood chips or chunks like hickory, mesquite, or applewood. The low, indirect heat and smoke work together to create delicious, melt-in-your-mouth ribs.
Grilling Method
Grilling is a quick and easy way to cook pork back ribs. The ribs can be seasoned with a dry rub or marinade, then grilled over direct heat until charred and caramelized on the outside while remaining juicy and tender inside. For added flavour, basting the ribs with a sauce or glaze during the grilling process is a popular technique.
No matter which method you choose, pork back ribs are a delicious and versatile cut of meat that can be prepared in many different ways to suit your taste preferences.
The Culinary Tradition of Pork Back Ribs in Ontario
Ontario’s love affair with pork back ribs runs deep, woven into the fabric of the province’s culinary heritage. These succulent cuts of meat have graced backyard barbecues, family gatherings, and restaurant menus for generations, becoming an integral part of Ontario’s diverse food culture.
Pork back ribs hold a special place in the hearts and stomachs of Ontarians, celebrated for their rich flavour and versatility. From the classic barbecue rib slathered in tangy sauce to the fall-off-the-bone ribs braised in local craft beer, each region and community has put its unique spin on this beloved dish.
In the cosmopolitan cities like Toronto, pork back ribs are a canvas for global influences, with chefs drawing inspiration from various cuisines to create fusion masterpieces. Whether it’s the sticky-sweet Asian-inspired ribs or the fiery jerk-rubbed ribs with a Caribbean flair, the possibilities are endless.
Venture into the rural pockets of Ontario, and you’ll find time-honored family recipes passed down through generations, each with its own secret blend of spices and cooking techniques. From the smoky, slow-cooked ribs of the Niagara region to the tangy, vinegar-based ribs of the Southwestern Ontario, every bite tells a story of tradition and local pride.
Recommended Side Dishes, Sauces, and Beverages for Pork Back Ribs
When it comes to pork back ribs, the sides and accompaniments can make or break the meal. To elevate your rib-eating experience, consider pairing them with the following delicious options:
Side Dishes
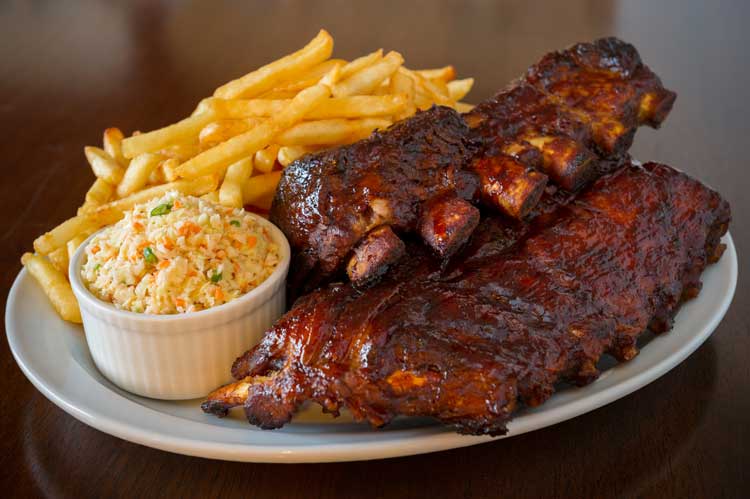
– Coleslaw: The cool, crisp texture of coleslaw provides a refreshing contrast to the rich, smoky flavours of pork ribs. A classic creamy coleslaw or a tangy vinegar-based slaw both make excellent choices.
– Baked Beans: Slow-cooked baked beans are a quintessential barbecue side dish that complements pork ribs perfectly. The sweet and savoury flavours meld together harmoniously.
– Corn on the Cob: Fresh, grilled, or roasted corn on the cob is a summertime staple that pairs beautifully with pork ribs. Its natural sweetness balances the richness of the meat.
– Potato Salad: A classic potato salad, whether mayo-based or vinegar-based, provides a cool and starchy contrast to the tender, juicy pork ribs.
– Mac and Cheese: Creamy, cheesy macaroni and cheese is a comforting side dish that pairs exceptionally well with the smoky flavours of pork ribs.
Sauces
– Barbecue Sauce: No rib feast is complete without a tangy, smoky barbecue sauce. Whether you prefer a Kansas City-style sauce, a Carolina mustard-based sauce, or a sweet and sticky sauce, it’s the perfect condiment for slathering on your ribs.
– Ranch Dressing: A cool, creamy ranch dressing can provide a refreshing contrast to the bold flavours of pork ribs, especially when served with a crisp vegetable like celery or carrot sticks.
– Honey Mustard: The sweet and tangy combination of honey mustard complements the rich, savoury flavours of pork ribs beautifully.
Beverages
– Craft Beer: A hoppy, full-bodied craft beer pairs exceptionally well with the smoky, meaty flavours of pork ribs. Consider an IPA, amber ale, or a robust porter or stout.
– Lemonade or Iced Tea: For a refreshing, non-alcoholic option, serve your pork ribs with a tall glass of freshly squeezed lemonade or iced tea. The tartness helps cut through the richness of the meat.
– Sweet Tea: Sweet tea, a Southern staple, is a natural companion to pork ribs, providing a touch of sweetness to balance the savoury flavours.
Presentation Ideas
– Serve on a Platter: Arrange the pork ribs on a large platter or wooden board, garnished with fresh herbs, lemon wedges, and perhaps a sprinkling of coarse salt or cracked black pepper.
– Use Butcher Paper: For a rustic, casual presentation, line a basket or tray with butcher paper and pile the ribs on top. Encourage guests to grab a rib or two and enjoy them with their hands.
– Provide Wet Naps or Moist Towelettes: Pork ribs can be messy, so provide wet naps or moist towelettes for easy cleanup.
– Offer Rib Bibs or Napkins: To protect clothing from saucy drips and spills, offer rib bibs or large, sturdy napkins to your guests.
Remember, the key to a successful rib feast is to strike a balance between the rich, smoky flavours of the pork and the complementary sides, sauces, and beverages. With the right accompaniments and a thoughtful presentation, your pork back rib meal will be a surefire hit.
Summary of Key Points on Pork Back Ribs
Pork back ribs are a delicious and flavourful cut that offers a unique combination of tender meat and crispy, smoky bark when cooked properly. Here are some key takeaways about this beloved barbecue staple:
Flavour Profile: Pork back ribs have a rich, porky flavour that takes on incredible smoky notes when slow-smoked over wood or charcoal. The meat itself is relatively lean, but the thin layer of fat renders down during cooking, basting the meat and adding incredible depth of flavour.
Texture: When cooked low and slow, pork back ribs develop a tender, fall-off-the-bone texture that’s incredibly satisfying to bite into. At the same time, the exposed rib bones and meat develop a crispy, almost candied bark that provides an amazing textural contrast.
Versatility: While often associated with classic American barbecue, pork back ribs can be prepared in a variety of ways to suit different cuisines and flavour preferences. From dry rubs to wet marinades, sweet or spicy sauces, these ribs are a delicious canvas for creativity.
Cost-Effective: Compared to other pork cuts or beef ribs, pork back ribs are generally an affordable option, making them a great choice for feeding a crowd or enjoying a flavourful meal on a budget.
In summary, pork back ribs are a true barbecue classic that should be in every pit master’s repertoire. With their incredible flavour, satisfying texture, and versatility, they’re sure to be a crowd-pleaser at any backyard gathering or family meal. So fire up the smoker, grab your favourite rub or sauce, and get ready to experience the pure joy of perfectly smoked pork back ribs.