The Secret to Perfectly Cooked Juicy Chicken Breast Every Time

the-secret-to-perfectly-cooked-juicy-chicken-breast-every-time

What Is Boneless Chicken Breast?

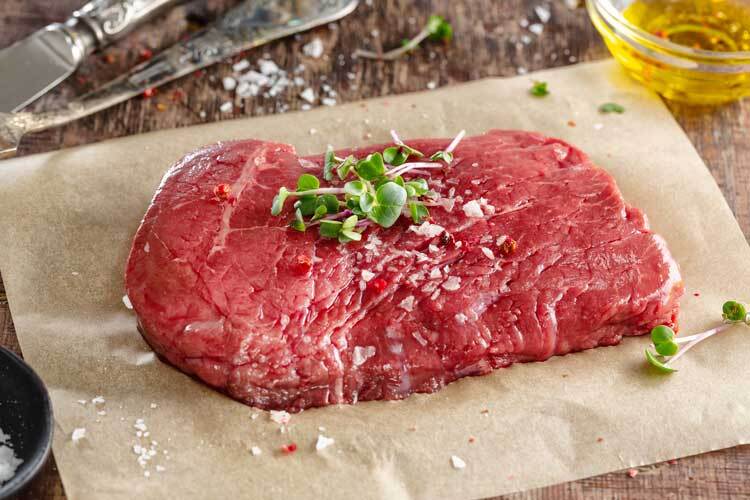
Boneless chicken breast is a lean cut of poultry that has had the bones removed, leaving only the meat from the breast portion. It is one of the most popular and versatile cuts of chicken due to its mild flavour, tender texture, and ease of preparation.

Boneless chicken breasts are a staple in many households and restaurants worldwide. Their popularity stems from their ability to take on a wide range of flavours and cooking methods, making them a canvas for countless dishes across various cuisines. From grilled, baked, or pan-seared preparations to being the star ingredient in salads, sandwiches, or stir-fries, boneless chicken breasts offer endless possibilities.

The versatility of boneless chicken breasts extends beyond their culinary applications. They are also a convenient and time-saving option for busy home cooks or those looking for a quick and healthy protein source. Without the need to deal with bones, boneless chicken breasts can be easily sliced, diced, or pounded into desired shapes and sizes, streamlining the cooking process.

Nutritional Value

Boneless chicken breast is an excellent source of lean protein, making it a staple in many health-conscious diets. This protein is composed of all the essential amino acids needed for building and repairing tissues, making it a complete protein source.

In addition to protein, boneless chicken breast is a good source of several vitamins and minerals. It is particularly rich in niacin (vitamin B3), which plays a crucial role in energy metabolism and maintaining healthy skin and nerves. Chicken breast also provides significant amounts of vitamin B6, which supports immune function and protein metabolism.

Other notable vitamins and minerals found in boneless chicken breast include:

– Phosphorus: Essential for bone health and energy production

– Selenium: An antioxidant mineral that supports immune function

– Zinc: Crucial for wound healing and immune system support

– Vitamin B12: Necessary for red blood cell formation and neurological function

With its impressive nutrient profile, boneless chicken breast is a versatile and nutritious choice that can be easily incorporated into a balanced diet, providing essential nutrients while keeping calorie and fat intake in check.

Preparation Methods

Boneless chicken breasts are incredibly versatile and can be prepared in a variety of ways. Here are some popular cooking methods:

Baking: One of the easiest and healthiest ways to cook chicken breast is by baking it in the oven. Preheat your oven to 400°F (200°C), season the chicken with your desired spices and herbs, and bake for 20-25 minutes, or until the internal temperature reaches 165°F (75°C). Baking chicken breasts results in a juicy and tender texture.

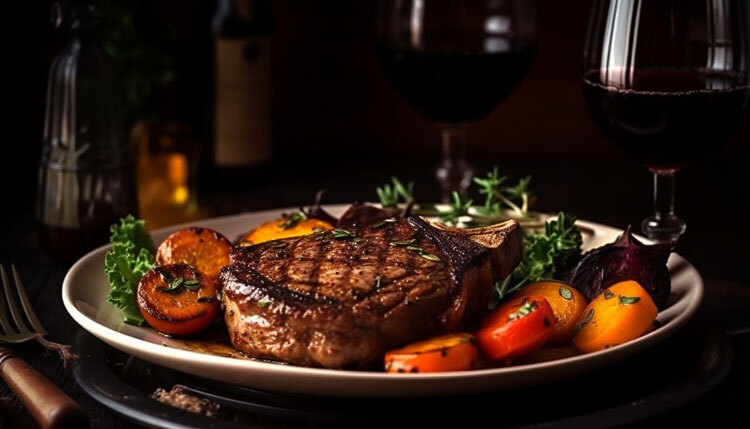
Grilling: Grilling adds a delicious smoky flavour to chicken breasts. Preheat your grill to medium-high heat and grill the chicken for 6-8 minutes per side, or until cooked through. Brush the chicken with a little oil or marinade to prevent sticking and add extra flavour.

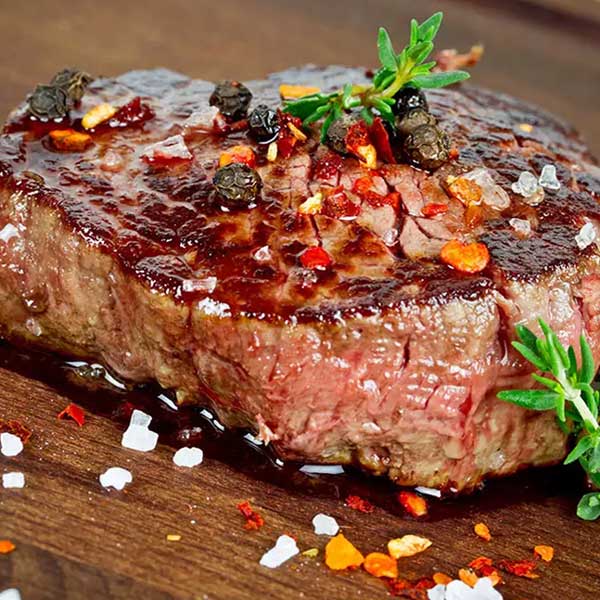
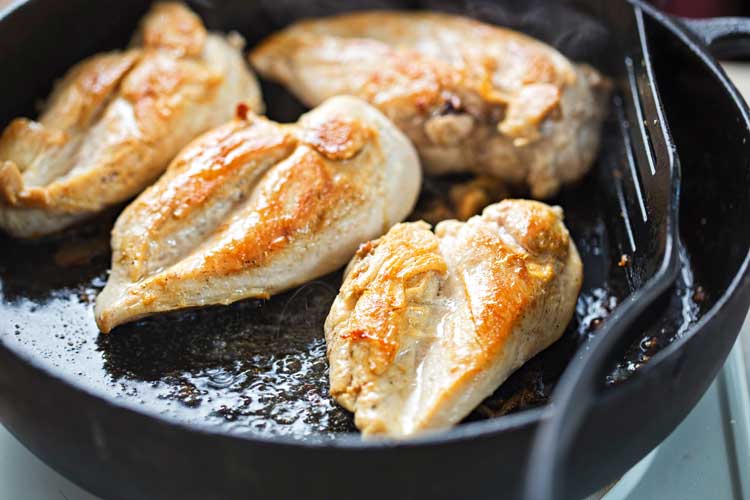
Sautéing: For a quick and easy meal, sautéing is a great option. Heat a skillet or pan over medium-high heat, add a little oil or butter, and cook the chicken breasts for 4-5 minutes per side, or until golden brown and cooked through.

Poaching: Poaching is a gentle cooking method that keeps the chicken breasts incredibly moist and tender. Bring a pot of water or chicken broth to a simmer, add the chicken breasts, and poach for 12-15 minutes, or until cooked through.

Marinating: Marinating chicken breasts not only adds flavour but also helps to tenderize the meat. Mix together your desired marinade ingredients (e.g., olive oil, vinegar, herbs, spices) and let the chicken breasts soak for at least 30 minutes, or up to 24 hours for maximum flavour.

No matter which cooking method you choose, be sure to use a meat thermometer to ensure the chicken reaches an internal temperature of 165°F (75°C) to ensure it’s cooked through and safe to eat.

Chicken Breast Recipes

Boneless chicken breasts are a versatile canvas for countless recipes across diverse cuisines. Classic dishes like Chicken Parmesan, Chicken Marsala, and Chicken Cordon Bleu showcase the protein’s ability to take on rich flavours. For ethnic flair, try Chicken Tikka Masala, Chicken Fajitas, or Teriyaki Chicken. Healthy options include Lemon Garlic Chicken, Balsamic Chicken, and Grilled Chicken Salad. Chicken breasts also lend themselves well to meal prep with dishes like Chicken Stir Fry, Chicken Burrito Bowls, and Marinated Baked Chicken that can be portioned out for the week ahead.

Flavour Pairings

Boneless chicken breast is a versatile canvas for a wide range of flavours. Its mild taste allows it to take on the flavours of herbs, spices, sauces, and marinades with ease. Here are some delicious flavour pairings to elevate your boneless chicken breast dishes:

Herbs

– Rosemary: Its earthy and slightly piney notes complement chicken beautifully.

– Thyme: This herb adds a warm, earthy aroma and flavour to chicken dishes.

– Basil: Fresh basil brings a bright, slightly sweet flavour to chicken.

– Cilantro: For a burst of freshness, cilantro pairs well with Mexican or Asian-inspired chicken dishes.

Spices

– Paprika: Smoked or regular paprika adds warmth and a touch of sweetness.

– Cumin: This earthy spice is a perfect match for chicken in Tex-Mex or Indian-inspired dishes.

– Chili Powder: A blend of spices like cumin, garlic, and chili peppers, it adds a kick of heat.

– Curry Powder: For an aromatic and flavourful twist, curry powder is a great choice

Sauces

– Pesto: The combination of basil, pine nuts, and Parmesan creates a vibrant sauce for chicken.

– Teriyaki: Sweet and savoury, teriyaki sauce adds a delicious glaze to grilled or baked chicken.

– Salsa: Fresh salsa adds a zesty, tangy flavour to chicken dishes.

– Creamy Garlic: A rich, garlicky sauce perfectly complements the tender chicken.

Marinades

– Italian Dressing: A classic marinade that infuses chicken with Italian herbs and tangy flavours.

– Yogurt Marinade: Yogurt tenderizes the chicken while adding a subtle tang.

– Citrus Marinade: Lemon, lime, or orange juice brighten up the flavour of chicken.

– Brine: A simple brine of salt and water can make chicken incredibly moist and flavourful.

With these flavour pairings, you can transform a simple boneless chicken breast into a delightful and flavourful meal every time.

Cooking Temperatures

– Cook boneless chicken breasts to an internal temperature of 165°F (74°C) as measured by a food thermometer.

– Chicken should be cooked until the juices run clear, and there is no pink remaining.

– Reheat leftovers to an internal temperature of 165°F (74°C).

Boneless vs Bone-In

The decision between boneless or bone-in chicken breast often comes down to personal preference, but there are distinct differences in flavour, texture, and cooking times to consider.

Flavour: Bone-in chicken breast tends to have a richer, more pronounced chicken flavour. The bone helps insulate the meat during cooking, allowing the natural flavours to develop more fully. Boneless breasts can sometimes taste a bit blander in comparison.

Texture: Bone-in chicken breasts retain more moisture during cooking, resulting in a juicier and more tender texture. The bone acts as a heat insulator, preventing the meat from drying out too quickly. Boneless breasts are more prone to overcooking and drying out if not cooked carefully.

Cooking Times: Boneless chicken breasts generally cook faster than bone-in breasts. Without the bone, the heat can penetrate the meat more directly, reducing cooking times by several minutes. Bone-in breasts require a bit more time to ensure the meat nearest the bone reaches a safe internal temperature.

When opting for boneless breasts, take care not to overcook them, as they can quickly become dry and tough. Bone-in breasts offer a bit more forgiveness, as the bone helps retain moisture even if cooked slightly longer. Ultimately, both options can yield delicious results when cooked properly, but bone-in breasts often provide a slight edge in flavour and juiciness.

Chicken Fun Facts

Did you know that chickens are one of the most widely domesticated animals globally? These feathered friends have been part of human civilization for thousands of years and have played a significant role in various cultures and traditions.

Chickens were first domesticated from wild jungle fowl in Asia, and the earliest evidence of their domestication dates back to around 8000 BC in China. Over time, they spread across the world, becoming an essential source of food and a symbol of fertility and prosperity in many societies.

In ancient Greece, chickens were associated with the god of prophecy, Apollo, and their behaviour was believed to have predictive powers. The Romans, on the other hand, used chickens in divination rituals, interpreting their feeding patterns to make important decisions.

Moving to the modern era, chickens have become a pop culture phenomenon. From the beloved Chicken Run movie to the iconic rubber chicken prank toy, these birds have captured the hearts and imaginations of people worldwide.

Interestingly, chickens are quite intelligent creatures. They can recognize up to 100 different faces, have complex social hierarchies, and even possess the ability to perform basic arithmetic. Who knew these feathered friends were so smart?

So, the next time you enjoy a delicious boneless chicken breast, take a moment to appreciate the rich history and cultural significance behind these remarkable birds.

Canada’s Best Kept Secret: Indulging in Melt-In-Your-Mouth New York Striploins

canadas-best-kept-secret-indulge-in-new-york-striploins

The New York strip steak, also known as a striploin steak, Kansas City strip, Manhattan steak, or sirloin steak, is one of the most popular premium beef cuts in Canada. This tender and flavourful steak comes from the short loin primal cut, which is located along the upper back between the rib and sirloin.

While the exact origins of the New York strip are disputed, it rose to prominence as a signature menu item at New York City steakhouses in the late 19th century. Delmonico’s restaurant in particular is often credited with popularizing and naming this cut. It became a staple of upscale dining establishments, prized for its tenderness and beefy flavour.

Over the decades, the New York striploin has also become a backyard barbecue favourite for Canadians. It is now considered one of the classic steaks, along with ribeye and filet mignon. The striploin offers the perfect balance of marbling, texture, juiciness and rich taste that steak connoisseurs crave. When cooked properly, it delivers a quintessential steakhouse experience.

Types of Cuts

The New York strip steak, also known as a striploin steak, Kansas City strip, or sirloin steak, comes from the short loin of a cow. It is one of the most popular premium steak cuts due to its tenderness and rich flavour. However, there are a few other common premium steak cuts that are often compared or confused with the New York strip:

Ribeye – The ribeye steak comes from the rib section, in front of the short loin. It contains more internal marbling or fat than the New York strip, which makes it exceptionally tender and flavourful. The extra fat gives it a distinctive rich, beefy taste.

Tenderloin – The tenderloin is cut from the short loin, like the New York strip, but is the most tender cut of beef. Tenderloin steaks include the filet mignon. They have very little fat, which makes them lean yet tender. However, they lack some of the bolder “beefy” flavour of ribeyes or New York strips.

New York Strip – New York strips offer a balance between the tenderloin and ribeye. They have the tenderness of a tenderloin but more flavour than a filet mignon, while still being leaner than a ribeye. The strip’s leanness contributes to its texture and delicate flavour.

So in summary:

  • Ribeyes contain the most fat and therefore the boldest beef flavour.
  • Tenderloins are the most tender but have a mild flavour.
  • New York strips offer the best of both worlds with tenderness and rich flavour.

Raising Cattle in Canada

Canada’s cattle industry is concentrated in the western prairie provinces, with Alberta being the heart of cattle country. The majority of Canada’s beef cattle are raised on expansive ranches in Alberta, taking advantage of the province’s abundant grasslands and ideal climate for grazing.

Alberta accounts for over 40% of Canada’s beef cattle herd, with approximately 5 million head of cattle. The ranches are located across the southern and central regions of the province, with major cattle centres including Calgary, Lethbridge, Medicine Hat, and Brooks. Cattle ranching is deeply ingrained in Alberta’s history and culture.

Ontario and Quebec are also significant beef producing provinces in Canada. While not home to sprawling ranches like Alberta, they have a sizable number of beef farms and feedlots. Ontario ranks second to Alberta in cattle inventory, with over 1 million head of cattle. The industry is concentrated in the southwestern region of the province.

Quebec is third in Canadian cattle production, with a herd of around 950,000 cattle. The Montérégie region near Montreal and the Chaudière-Appalaches region near Quebec City are major hubs of cattle farming in the province.

Canada’s temperate climate, abundant land, and plentiful water supply provide ideal conditions for cattle ranching across these key beef producing provinces.

Grilling Tips

Grilling the perfect New York striploin steak requires paying attention to temperature, timing, and seasoning. Here are some best practices:

  • Get the grill as hot as possible. You want the grill to be 500-600°F if using charcoal or set to high if using gas. This level of heat is key for getting a good sear and locking in the juices.
  • Pat the steaks dry and coat lightly with oil. Make sure to thoroughly dry the steaks with paper towels before putting them on the grill. Then, brush or rub lightly with an oil that can withstand high heat, like avocado, grapeseed, or refined coconut oil. This helps promote browning.
  • Season the steaks generously with salt and pepper. Sprinkle coarse kosher salt and freshly cracked black pepper evenly over both sides of the steaks. This adds flavour and aids browning via the salt. Other seasonings like garlic powder, onion powder, or steak seasoning blends can also be used.
  • Sear both sides for 2-3 minutes. Place the steaks on the grill and let them sear untouched for 2-3 minutes, until a nice crust forms. Use tongs to flip and sear the other side. Avoid moving the steaks too much.
  • Grill to desired doneness, about 3-8 more minutes. For medium-rare, grill for 3 more minutes after searing both sides. Use an instant-read thermometer to check doneness – 125°F is medium-rare. For medium or beyond, grill up to 8 minutes more, until it reaches 135-145°F on a thermometer.
  • Let rest 5 minutes before slicing and serving. This allows the juices to redistribute evenly throughout the steak for maximum tenderness and flavour. Resist cutting into it right away!

Following these simple tips will help you achieve the perfect grilled New York striploin steak with a crispy sear, evenly cooked interior, and mouthwatering flavour. Enjoy this steakhouse classic in your own backyard.

Best Accompaniments

The New York striploin steak is incredibly versatile when it comes to pairing with sauces and sides. The rich, beefy flavour can stand up to bold sauce flavours, while also pairing nicely with lighter options.

Recommended Sauce Pairings

  • Béarnaise – This classic French sauce made with butter, egg yolks, and tarragon is a perfect complement to the New York strip. The richness of the sauce enhances the flavour of the beef.
  • Chimichurri – An Argentinian green sauce made with parsley, garlic, olive oil, and vinegar. The brightness of the chimichurri cuts through the richness of the steak.
  • Peppercorn – A peppery sauce made with cracked black peppercorns, cognac, and cream. The spiciness accentuates the flavour of the steak.
  • Blue Cheese – The bold, salty flavour of blue cheese sauce makes a delicious pairing with steak. The creaminess balances the charred exterior of the meat.
  • Horseradish Sauce – The sinus-clearing zing of horseradish complements the hearty steak. The cream tames the heat for a perfect balance of flavours.

Recommended Vegetable Sides

  • Baked potato – A classic steakhouse accompaniment. Loaded with butter, sour cream, cheese, and bacon, it’s the perfect starchy side.
  • Creamed spinach – Buttery, garlicky spinach is a flavourful accompaniment. The creaminess balances the charred crust of the steak.
  • Sauteed mushrooms – Meaty mushrooms like portobello or cremini sauteed in garlic and olive oil make a savoury side.
  • Grilled asparagus – The vegetal flavour of grilled asparagus with a squeeze of lemon brightens up the steak dinner.
  • Brussels sprouts – Roasted or sauteed Brussels sprouts caramelized with balsamic make a delicious pairing.

The options for sauces and vegetable sides are endless. Play with different flavours and textures to create the ultimate steakhouse meal. The rich New York strip can handle the boldest of flavours.

Recipes

The New York striploin steak is incredibly versatile and can be used in recipes beyond just grilling and pan-searing. Here are some creative recipe ideas to make the most of this premium cut of beef:

Steak Salad

Thinly slice a grilled New York striploin and serve over a bed of fresh salad greens, tomatoes, onions, avocado, and crumbled blue cheese. Drizzle with a balsamic vinaigrette for a satisfying lunch or light dinner.

Steak and Eggs

There’s no better way to start the day than with a New York striploin steak and eggs! Cook the steak to your liking then slice and serve with sunny side up or scrambled eggs for a protein packed breakfast.

Steak Fajitas

Slice a grilled New York striploin into thin strips and sauté with bell peppers and onions. Wrap in warm tortillas and top with guacamole, salsa, and sour cream for an easy weeknight meal.

Steak Stir Fry

Cut a grilled New York striploin into bite-sized pieces and stir fry with broccoli, carrots, mushrooms, and soy sauce. Serve over rice for a healthy and quick dinner.

Steak Pizza

Top a prepared pizza crust with sliced grilled steak, mozzarella cheese, caramelized onions, mushrooms, and a drizzle of balsamic reduction. Bake until the cheese is melted and bubbly for a unique pizza night.

Steak and Potato Soup

Simmer sliced grilled steak in a hearty soup loaded with potatoes, carrots, celery, and savoury seasonings. Top with sour cream, green onions, and crusty bread for a comforting meal.

The possibilities are endless when cooking with a high-quality cut like the New York striploin steak. Get creative and enjoy this versatile ingredient in new ways!

The Ultimate NY Striploin Experience

The New York striploin is truly the king of steaks. When sourced from Canadian ranchers, dry aged to perfection, grilled over hot coals, and served alongside a loaded baked potato and crisp salad, the New York striploin provides a transcendent steakhouse experience right at home.

Here are some tips for crafting the ultimate NY striploin night:

Select the Perfect Cut

Visit a local butcher shop and hand select thick, marbled New York striploins, ideally around 1.5 inches thick. The ample marbling will baste the meat from the inside out. Go for Canadian AAA grade beef for the highest quality.

Dry Age At Home

Dry aging tenderizes meat and concentrates the beefy flavour. Place the steaks uncovered on a wire rack in the fridge for 4-7 days. The outer layer will darken but don’t trim it until ready to cook.

Fire Up The Grill

Get your charcoal grill scorching hot, around 500°F. The high heat will caramelize the outside while keeping the inside pink. Grill for 4 minutes per side. Add a pat of herb butter on top in the last 2 minutes.

Loaded Baked Potato

Baked potatoes are the perfect accompaniment. Load them up with cheddar, bacon, sour cream, and chives. Wrap in foil and place them on the grill about 40 minutes before the steaks.

Crisp Salad

Balance out the rich meat with a fresh salad. Go for a mix of leafy greens, cherry tomatoes, cucumbers, and a tangy vinaigrette dressing.

Special Touches

Set the mood with candlelight, linen napkins, and fine stemware. Play some Frank Sinatra. Savor every moment of this exquisite steakhouse experience in the comfort of your home.

The Ultimate Guide to Cooking the Perfect Filet Steak

the-ultimate-guide-to-cooking-the-perfect-filet-steak

Filet steak, also known as filet mignon, tenderloin steak, or beef tenderloin, refers to cut of beef taken from the tenderloin, which is a muscle that runs along the spine of the cow. Filet steaks are prized for their tenderness and flavour.

The tenderloin is one of the most tender cuts of beef because these muscles don’t get much exercise, and therefore have less connective tissue. This makes filet steaks melt-in-your-mouth tender. However, the lack of fat marbling means filet steaks are not as inherently flavourful as cuts like ribeye or strip steak.

Properly cooking filet steak is all about bringing out its best qualities – maximizing tenderness while adding flavour. When cooked correctly, the buttery texture of the filet combines beautifully with seasonings and sauces. This makes it a perfect choice for elegant dinners and special occasions.

Buying Quality Filet Steak

When shopping for filet steak, it’s important to look for certain characteristics to ensure you’re getting a high-quality cut of meat. Here’s what to look for:

  • Marbling – This refers to the thin white lines of fat running through the meat. A moderate amount of marbling is ideal as it keeps the meat tender and flavourful during cooking. Avoid cuts with large chunks of fat.
  • Cut Surface – The cut surface of the meat should be bright red and velvety looking. Dry or brown edges mean the steak has been sitting around too long.

Following these tips will help you select tender, juicy, and flavourful filet steaks perfect for cooking up a delicious meal.

Preparing the Steak

Properly preparing your filet steak before cooking is an essential step to ensure the meat cooks evenly and develops maximum flavour. Here are some tips:

  • Take the steak out of the fridge and allow it to come closer to room temperature before cooking. Cold steak will cook unevenly. Take it out of the fridge about 30 minutes before cooking.
  • Generously season both sides of the steak with salt and pepper. Kosher or sea salt is best as the flakes will stick to the meat well. Freshly cracked black pepper adds great flavour. You can also use other dried herbs and spices like garlic powder, onion powder, paprika or rosemary.
  • Optionally, brush or rub the steaks with a thin coating of oil. This helps the seasoning stick and creates a nice sear. Use an oil with a high smoke point like avocado, grapeseed or canola oil.
  • Let the seasoned steaks sit at room temperature for about 15-30 minutes before cooking. This allows the salt to penetrate and seasons the meat all the way through.
  • Pat the steaks very dry with a paper towel right before cooking. You want the surface as dry as possible to get the best sear.

Starting with properly seasoned room temperature steak will ensure you get the perfect cook with a flavourful crust and tender interior every time.

Cooking Methods

There are several excellent methods for cooking a filet steak, each with their own advantages.

Pan Searing

Pan searing is a classic and easy method for cooking filet steak. Use a heavy cast iron or stainless steel pan and get it very hot before adding oil. Brush the steaks with oil then place them in the pan. Sear the steaks for 2-3 minutes per side to get a nice brown crust. Flip only once during cooking. Use tongs instead of a fork to avoid piercing the meat and losing juices. Pan searing keeps the steaks tender and juicy on the inside while providing that flavourful sear on the outside.

Grilling

Grilling over high heat is another excellent option for cooking filet steaks. Prepare a hot charcoal or gas grill. Place the steaks directly over the heat and grill for 4-7 minutes per side, depending on thickness. The high heat helps sear the outside while keeping the inside pink and juicy. Flip only once during cooking. Grilling imparts a wonderful smoky flavo from the charcoal or wood chips. It allows fat to drip away from the steaks as they cook too.

Broiling

Broiling in the oven is a convenient hands-off method. Place the steaks on a broiler pan lined with aluminum foil and set the oven to high broil. Broil for 6-8 minutes per side until done to your desired doneness. Keep a close eye to avoid overcooking. The intense overhead heat from the broiler sears the outside of the steaks nicely. Broiling requires no flipping or monitoring during cooking. It lets you easily cook multiple steaks at once too.

Sous Vide

For the most tender and juicy filet steak, cook it using the sous vide technique. Place in a water bath at 130°F for 1-4 hours depending on thickness. This low temperature gently cooks the steaks to medium rare throughout without overcooking the outside. Finish by searing the steaks briefly on each side to get a nice crust. Sous vide yields incredibly tender, evenly cooked steaks edge to edge.

Pan Searing a Filet Steak

Pan searing is a quick and easy method for cooking filet steak with delicious, browned crust on the outside while keeping the inside nice and tender. Follow these simple steps for pan searing filet steak to perfection:

Ingredients

  • 1 filet steak, about 1 inch thick
  • Olive oil
  • Salt and pepper
  • Butter (optional)
  • Fresh thyme or rosemary (optional)

Instructions

  1. Take the filet steak out of the fridge and let it come up to room temperature, about 30 minutes. Pat, it dry thoroughly with paper towels.
  2. Season the steak generously on both sides with salt and pepper. You can also rub some olive oil over the steak to help promote browning.
  3. Heat a cast iron or stainless-steel skillet over high heat until very hot. Add just enough olive oil to coat the bottom of the pan.
  4. When the oil is shimmering hot, add the steak. Let it sear undisturbed for about 90 seconds until a nice brown crust forms.
  5. Flip the steak over and sear the other side for another 60-90 seconds for medium-rare doneness. Use tongs to lift the steak up and check the browning.
  6. If desired, add a tablespoon of butter, fresh thyme or rosemary to the pan. Tilt the pan and spoon the butter over the steak to baste it.
  7. Remove the steak from the pan and let it rest on a cutting board for 5-10 minutes before slicing and serving. The resting time allows the juices to redistribute evenly throughout the meat.

Tips

  • Let the pan and oil heat up well before adding the steak. This helps create a better sear.
  • Resist moving the steak around too much. Let it sear undisturbed to get that crust.
  • Use a meat thermometer to check doneness. Pull it off the heat at 115F for rare or 125F for medium-rare.
  • Basting with butter, herbs and garlic adds great flavour. Try mixing them into a compound butter.
  • Letting the steak rest after cooking is crucial for juicy results!

With just a hot skillet and a few minutes, you can enjoy a restaurant-quality filet steak cooked to perfection right at home. The quick sear gives you that flavourful crust while keeping the inside nice and tender.

Grilling a Filet Steak

Grilling is a classic and delicious way to cook a filet steak. Follow these steps for perfect results:

Ingredients

  • Filet steak, about 1-1.5 inches thick
  • Salt and pepper
  • Butter, olive oil, or other grilling fat

Instructions

  1. Take the filet steak out of the fridge and let it come up to room temperature, about 30 minutes. This helps it cook more evenly.
  1. Prepare your grill by heating it to high heat. For a gas grill, turn all burners to high. For charcoal, let the coals become hot and ashed over, or use hardwood lump charcoal.
  1. Pat the steak dry with paper towels. Season liberally with salt and pepper on both sides. You can also use other dry rubs or herbs at this stage. Press the seasoning into the meat.
  1. Use a grill brush to clean the grates. Then grease them by rubbing a folded paper towel dipped in oil over the grates. This prevents sticking.
  1. Place the filet steak on the hot grill. Let it sear undisturbed for 2-3 minutes. This creates a nice crust.
  1. Flip the steak using tongs. Cook another 2-3 minutes. Keep flipping every few minutes for even cooking.
  1. Add a knob of butter, olive oil, or other fat to the top of the steak as it grills. This bastes the meat and adds flavour.
  1. Grill to your desired doneness, about 8-12 minutes total for medium-rare. Use the poke test or a meat thermometer to check for doneness.
  1. Let the steak rest off the grill for 5-10 minutes. This allows the juices to reabsorb for a tender, juicy steak.

10. Serve the grilled filet steak hot off the grill. Enjoy!

Tips

  • Let the steak come to room temp before grilling for even cooking.
  • Make sure the grill is very hot. Sear over direct high heat.
  • Flip frequently to prevent burning.
  • Add fat or oil to baste the steak as it cooks.
  • Let it rest before slicing for a juicier steak.
  • Resist cutting into it right away! Resting is crucial.
  • For perfect grill marks, rotate the steak 45-90 degrees with each flip.

Grilling really brings out the rich, beefy flavour of a filet steak. Follow these simple steps for the ultimate grilled filet at home.

Broiling a Filet Steak

Broiling is a great hands-off method for cooking filet steak. It involves cooking the steak under direct, intense heat in your oven’s broiler. Follow these steps for broiling the perfect filet steak:

Ingredients

  • 1 filet steak, 1-1.5 inches thick
  • Olive oil or melted butter for brushing
  • Salt and freshly ground black pepper
  • Herb seasoning (optional)

Instructions

  1. Take the filet steak out of the fridge and let it come up to room temperature, about 30 minutes. Pat it dry with paper towels.
  1. Set an oven rack about 6 inches from the broiler and preheat the broiler to high. Line a rimmed baking sheet with foil.
  1. Brush both sides of the steak lightly with olive oil or melted butter and season generously with salt and pepper. You can also use an herb seasoning like garlic powder, rosemary, or thyme.
  1. Place the steak on the prepared baking sheet. Broil for 4-7 minutes per side, flipping halfway through. The cooking time will depend on thickness and doneness preference.
  1. Use an instant-read thermometer to check for doneness. Remove the steak from the oven when it reaches your desired internal temperature. For medium-rare, take it out at 125°F.
  1. Transfer the steak to a cutting board and tent loosely with foil. Let rest for 5-10 minutes before slicing and serving.

Oven Tips

Keep a close eye on the steak when broiling – it can burn quickly under intense heat.

  • Position the oven rack higher or lower to adjust the intensity of the broiler. Place thick steaks further from the broiler element.
  • For grill marks, broil for 2-3 minutes per side then finish cooking on a hot grill pan.

Broiling is a simple, no-fuss way to get a juicy, evenly cooked filet steak with nice charring. With the right timing, you’ll get restaurant-quality results right from your oven.

Sous Vide Filet Steak

Sous vide is a cooking technique that uses precise temperature control to achieve the perfect level of doneness. It’s a fantastic method for cooking filet steak as it helps ensure the meat is cooked evenly throughout and remains incredibly tender.

Here’s how to sous vide a filet steak:

Equipment Needed

  • Sous vide immersion circulator
  • Large pot or container for water bath
  • Tongs
  • Paper towels

Instructions

  1. Set your sous vide immersion circulator to 130°F (54°C). This is the ideal temperature to cook filet steak to medium-rare doneness.
  1. Remove the steak from its packaging to season it, you will need sous vide bag to reseal it in.
  1. Once the water has come up to temperature, submerge the bagged steak in the water bath. Cook for 1-2 hours until the centre reaches your desired temperature.
  1. Remove the steak from the bag and pat dry thoroughly with paper towels. Sear the steak for 1 minute per side in a hot pan with oil or butter to develop a nice crust.
  1. Let the steak rest for 5 minutes before slicing and serving. The steak will be perfectly medium-rare from edge to edge!

Sous vide delivers tender, foolproof filet steak every time. Just be sure to properly sear after cooking to get that nice crust on the outside. Enjoy your sous vide success!

Doneness and Serving

Properly cooking filet steak to the right doneness and serving it with the perfect accompaniments is key to an exceptional steak experience. There are a few techniques for judging the doneness of your filet steak. The most reliable method is using an instant-read thermometer. Insert the thermometer into the thickest part of the steak and it should read:

  • Rare – 120-125°F
  • Medium Rare – 130-135°F
  • Medium – 140-145°F
  • Medium Well – 150-155°F
  • Well Done – 160°F+

You can also use the finger test by comparing the firmness of the meat to the fleshy part of your hand. Rare is soft and spongy, medium rare is slightly firmer but still spongy. Medium is firm with minimal give, and well done is hard with no sponginess.

The final doneness technique is cutting into the steak to visually inspect the interior colour. Rare will be bright red throughout, medium rare is bright red centre with pink around the edges, medium is light pink all over, and well done has no pink.

Once your filet steak is cooked, let it rest for 5-10 minutes before slicing and serving. This allows the juices to redistribute evenly throughout the meat for a moist and tender bite. Resist the urge to cut into it right away!

When it comes to sauces for filet steak, classic options include béarnaise, au poivre, red wine reduction, chimichurri, and compound butter. These all pair wonderfully with the rich flavour of filet. For side dishes, roasted or mashed potatoes, grilled asparagus, creamed spinach, and roasted brussels sprouts make excellent accompaniments. A filet steak dinner is truly a special occasion meal to savour.

Lean Ground Beef for Fitness Enthusiasts

lean-ground-beef-for-fitness-enthusiasts

Lean ground beef is a nutritious and versatile meat that has become a staple for many fitness enthusiasts. It’s made from beef with less than 10% fat content, meaning it has fewer calories and more protein compared to regular ground beef.

Specifically, a 100g serving of 90% lean ground beef contains:

  • Calories: 170
  • Fat: 8g
  • Saturated fat: 3g
  • Protein: 21g
  • Iron: 2mg (12% DV)
  • Zinc: 5mg (33% DV)
  • Vitamin B12: 2mcg (33% DV)

With its impressive nutritional profile, lean ground beef provides an excellent source of protein and important micronutrients like iron, zinc and B vitamins. The high protein content helps build and preserve muscle, while the nutrients support energy levels and overall health.

At the same time, the lower fat content makes lean ground beef a healthier red meat option. Going with the leanest cuts can fit into a balanced diet and support any fitness goal.

Benefits of Lean Beef for Fitness

Lean beef is an excellent source of high-quality protein that can help fitness enthusiasts build muscle mass and aid in recovery after exercise. A 3 ounce serving of lean beef contains around 25 grams of protein.

The protein in beef contains all the essential amino acids needed to stimulate muscle protein synthesis. Consuming protein after exercise has been shown to enhance the muscle building response to resistance training. Lean beef is also rich in iron, zinc, vitamins B6 and B12 which support energy metabolism and exercise performance.

In addition to protein, beef contains creatine and carnitine which can improve exercise capacity and training adaptations. Creatine plays a key role in providing energy for high intensity activities like weight lifting or sprints. Supplementing with creatine monohydrate is popular with athletes and bodybuilders, and eating lean beef provides creatine naturally.

The carnitine in beef helps transport fatty acids into the mitochondria of cells to be burned for energy. This can help reduce fatigue during endurance exercise and high-rep weight training. Overall, the nutritional profile of lean beef makes it an optimal choice for supporting fitness goals like building muscle mass and strength.

Choosing the Right Lean Beef

When selecting lean ground beef, look for packages labelled at least 90% lean. This ensures you are getting a healthy protein source without too much saturated fat. Grass-fed beef is an even better option, as it contains higher levels of anti-inflammatory omega-3 fatty acids compared to conventional beef.

Grass-fed beef also provides more conjugated linoleic acid (CLA), which may help reduce body fat and build muscle. Make sure to read the label closely and choose “grass-fed” rather than “grass-finished,” as grass-finished means the cows ate grass towards the end but were still fed grains for most of their lives.

When possible, choose organic and locally-sourced beef as well. Organic standards prohibit the use of hormones, antibiotics or GMOs that could be present in conventional beef. Local beef also has environmental benefits and allows you to better understand the source of your food.

Sample Meal Plans

Lean ground beef can be incorporated into meal plans for fitness enthusiasts looking to build muscle or lose fat. Here are some sample meal ideas:

Pre and Post Workout

  • Pre-workout: Beef and vegetable omelette with avocado. The protein and healthy fats will provide sustained energy.
  • Post-workout: Ground beef lettuce wraps. Lettuce wraps provide carbs to replenish glycogen stores. Top with salsa for extra nutrients.
  • Recovery smoothie: Blend ground beef with berries, spinach, Greek yogurt and milk for a nutrient-packed drink. The protein helps rebuild muscle.

Healthy Beef Recipes

  • Beef and broccoli stir fry over cauliflower rice. Load up on vegetables to get micronutrients.
  • Zucchini noodle Bolognese with lean ground beef and marinara sauce. Spiralized zucchini is a low-carb, high-protein pasta swap.
  • Beef barley soup with carrots and onions. Barley provides complex carbs and fibre.
  • Stuffed bell peppers with ground beef, quinoa, spinach and cheese. This balanced meal has protein, carbs and veggies.
  • Lettuce-wrapped burger with avocado. Skip the bun to reduce carbs and calories.

The key is choosing lean cuts of beef and pairing with vegetables, healthy carbs and good fats. Get creative with preparation methods and seasonings!

Cooking Methods

The chickens are raised on a vegetarian diet of grains and minerals from the farm’s pastures. This natural, pasture-raised diet enhances the flavour of the meat, producing a rich and delicious taste.

In addition, after processing the chickens are air chilled rather than water chilled. Air chilling allows the meat to retain more of its natural juices and freshness. The result is exceptionally tender, juicy chicken with a wonderful aroma.

When cooking the chicken, the rich flavour really shines through. The pasture-raised diet gives the meat a deeper, more savoury taste compared to conventional chicken. The air-chilled freshness also comes through in every bite. Overall, the flavour is robust, natural, and mouth-wateringly good.

Cooking

Lean ground beef is extremely versatile and can be prepared in many delicious ways that support fitness goals. Here are some of the best cooking methods:

Grilling

Grilling lean ground beef patties or burgers is a healthy and tasty option. Use a grill pan or outdoor grill for best results. Grill on medium-high heat for 4-5 minutes per side to get a nice char while keeping the inside moist. Top with fresh veggies like lettuce, tomato, onion and avocado.

Sautéing

Sauté lean ground beef in a skillet to make flavourful tacos, burrito bowls, pasta sauce, etc. Use a nonstick pan and sauté over medium-high heat, breaking up the meat as it browns. Season with spices like cumin, chili powder or garlic. Then add veggies and serve over rice, pasta or greens.

Meatballs

Make baked lean ground beef meatballs for a high protein snack or meal. Combine the beef with breadcrumbs, egg, and seasonings. Form into balls and bake at 375F for 20 minutes until browned and cooked through. Enjoy with marinara sauce and veggies.

Chili

Whip up a hearty chili with lean ground beef, tomatoes, beans, onions, peppers and spices like cumin and chili powder. Brown the beef in a pot first. Then add canned tomatoes, vegetables and seasonings and simmer for 30 minutes. Top with avocado, cheese or Greek yogurt.

Portion Control

When eating lean beef for fitness goals, portion control is key. It’s important not to overdo it on protein while also getting enough to support muscle growth and recovery. Here are some tips for healthy portion sizes of lean beef:

  • A serving of lean beef is about the size of a deck of cards or the palm of your hand. This is typically around 3-4 ounces cooked. Stick to this amount at each meal to avoid excess calories.
  • Balance lean beef with plenty of vegetables and some complex carbs like brown rice or quinoa. Half your plate should be non-starchy veggies, a quarter lean protein, and a quarter whole grains or starchy veggies.
  • Be mindful of condiments and oils added during cooking, as these can quickly increase the calories of an otherwise lean cut of beef. Use healthy fats like olive oil sparingly.
  • When eating out, be aware that restaurant portions are often larger than the recommended size. Feel free to take half home for leftovers to control portions.
  • Weighing or measuring portions can help develop an eye for proper serving sizes over time. Gradually reduce portions if trying to lose weight.
  • Pair lean beef with low-calorie foods like broth-based soups, salads, or roasted vegetables to create a balanced, nutrient-dense meal.

Sticking within reasonable portion sizes of 3-4oz lean beef while loading up on veggies and whole grains will help maximize the benefits of beef for fitness goals. Moderation and balance is key for health.

Conclusion

Lean ground beef can be a nutritious and protein-packed addition to a fitness enthusiast’s diet. Consuming high-quality lean protein after workouts helps repair and build muscle. Lean beef is an excellent source of protein, providing all 9 essential amino acids needed to stimulate muscle protein synthesis.

In addition to its high protein content, lean ground beef contains important vitamins and minerals like iron, zinc, and B vitamins. These support energy levels and workout performance. Lean beef is also rich in creatine, which can enhance strength, power, and muscle mass when combined with resistance training. 

When choosing extra-lean ground beef with at least 90% lean meat and 10% fat, it can fit into a balanced, calorie-controlled diet. Pay attention to portion sizes, and complement lean beef with plenty of vegetables, fruits, whole grains, nuts and healthy fats. With some creative meal prep and cooking methods, lean ground beef can be a tasty and beneficial addition to fuel fitness goals. Consuming it along with a smart overall nutrition plan will help enthusiasts make the most of their workouts.

Free-Range Chicken: The Pasture-Raised Life of Harriston’s Happy Hens

free-range-chicken-farming

Our free-range chickens are raised on family farms located in Harriston, Ontario. Unlike conventional chicken farming, our chickens are allowed to roam freely outside in the fresh air and sunlight. When the weather is too hot or cold, they can go inside large climate-controlled barns. We never use cages or cramped conditions – our chickens always have ample space to walk around, spread their wings, and exhibit natural behaviours. Their free-range environment ensures they grow strong, healthy and relaxed. Raising chickens in their natural habitat results in a better life for the birds and more nutritious, delicious meat for consumers. Our farmers take great pride in providing ethical, sustainable chicken farming practices.

Diet and Nutrition

The chickens at our farm are fed a wholesome vegetarian diet consisting of grains and minerals. This diet provides the essential nutrients they need for healthy growth and development.

The chickens have constant access to fresh, clean water. Hydration is extremely important for their health and wellbeing. We ensure ample drinking water is available at all times.

Our chickens are also raised without the use of added hormones or antibiotics. We don’t believe in using these artificial additives routinely. Our chickens are healthy and strong without relying on hormones or antibiotics.

Breed

The chickens at our farm are the White Rock breed. This breed originated in the Northeastern United States and was first recognized by the American Poultry Association in 1874.

White Rock chickens are a dual-purpose breed, meaning they are raised for both their meat and eggs. They are a hardy bird that is well-suited for free-range environments.

The White Rock breed is known for its bright white plumage and red combs and wattles. The chickens have broad, meaty breasts and produce large brown eggs.

This breed thrives in free-range conditions where they can roam and forage. At our farm, the White Rock chickens are able to express their natural behaviours outdoors in the fresh air and sunshine.

Air Chilled

After processing, the chickens are air chilled rather than water chilled. Air chilling helps retain flavour and provides a superior taste.

The chickens are chilled by hanging them in a cold room with constant air flow for several hours. This allows the chicken’s body heat to slowly dissipate while preventing cross-contamination from shared water baths. Air chilling is a gentler process that helps keep the meat tender and juicy.

Many mass market chickens are chilled in communal water baths. This can lead to cross-contamination as bacteria spreads from bird to bird. It also causes the chicken to absorb extra water weight.

Air chilling requires more time but results in higher quality chicken with better texture and purer flavour. The chickens retain their natural juices rather than absorbing excess water. This provides a firmer, juicier meat with more pronounced chicken taste.

Animal Welfare

The chickens at our farms are able to freely move around and express their natural behaviours. They have ample space in climate-controlled barns and access to the outdoors. We do not use cages on our farms, as we believe chickens should not be confined in small enclosures.

Our free-range farming practices allow the chickens to move about as they wish. They can perch, dust bathe, forage, and socialize. We provide enrichment materials like straw bales for them to peck and scratch. The chickens are able to go outside into secure outdoor areas. They can feel the sun on their backs and breathe the fresh air. We ensure they always have adequate space for exercising their wings and legs.

By not caging the chickens, we allow them to grow strong while engaging in natural activities like perching, foraging, and dust bathing. They get to satisfy their curiosity exploring their environment. We give them the freedom to behave like chickens.

Health and Safety

The chickens at our farms are raised in a safe, clean environment designed to promote health and prevent disease. We never use added hormones or antibiotics.

Hormones are sometimes given to chickens to accelerate growth. However, we don’t believe in manipulating chickens in this way. Our chickens grow at a natural rate on a balanced diet.

Antibiotics are occasionally used in some farms to reduce illness and disease. But we take a different approach by focusing on prevention through high-quality housing, ample space, and good nutrition. We don’t rely on antibiotics as a crutch for raising healthy chickens.

Our chickens live in climate-controlled barns with plenty of room to move around. The barns have good ventilation and are regularly cleaned. We also have strict biosecurity measures to prevent germs from entering the farm.

By avoiding hormones and antibiotics, we let the chickens develop a strong natural immunity. Our chickens grow strong while living in low-stress, sanitary conditions. This results in healthy, high-quality chickens that are nutritious and delicious.

Taste

The chickens are raised on a vegetarian diet of grains and minerals from the farm’s pastures. This natural, pasture-raised diet enhances the flavour of the meat, producing a rich and delicious taste.

In addition, after processing the chickens are air chilled rather than water chilled. Air chilling allows the meat to retain more of its natural juices and freshness. The result is exceptionally tender, juicy chicken with a wonderful aroma.

When cooking the chicken, the rich flavour really shines through. The pasture-raised diet gives the meat a deeper, more savoury taste compared to conventional chicken. The air-chilled freshness also comes through in every bite. Overall, the flavour is robust, natural, and mouth-wateringly good.

Cooking

Free-range chicken is versatile and can be prepared in many ways. Here are some cooking methods to try:

Roast

Roasting whole chickens or pieces at 350-375°F produces moist, tender meat with crispy skin. Brush with oil or rub on spices before roasting. Roast breasts for 30-40 minutes or legs/thighs for 40-50 minutes. Check internal temperature with a meat thermometer.

Grill

Grilling imparts delicious smoky flavour. Grill bone-in pieces over direct medium heat for 8-12 minutes per side with the lid closed. Grill boneless breasts 4-6 minutes per side. Baste with barbecue sauce during the last few minutes.

Sauté

Cut chicken into strips to sauté in a pan with oil over medium-high heat. Cook through in 8-10 minutes. Add diced veggies, cook 3-5 more minutes. Season with salt, pepper and fresh herbs.

Bake

Bake boneless breasts or tenders in a casserole dish at 375°F for 25-30 minutes until no longer pink inside. Coat with breadcrumbs or sauce before baking for more flavour.

Stir Fry

Cut chicken into 1-inch pieces. Stir fry in oil over high heat just until cooked through, 5-7 minutes. Add veggies and sauce, cook 1-2 more minutes. Serve over rice. 

Soup

Simmer boneless breasts, thighs or shredded chicken in broth with vegetables and seasonings for homemade soup. Cook gently for 15-20 minutes to infuse flavour.

Marinating chicken for 30 minutes to overnight before cooking adds lots of flavour. Try marinades with olive oil, herbs, garlic, citrus, soy sauce, yogurt, wine or spice rubs.

Nutrition

Free-range chickens from Harriston, Ontario are an excellent source of lean protein and important vitamins and minerals.

In addition to being high in protein and low in fat, free-range chicken contains a variety of vitamins and minerals. It is rich in niacin, vitamin B6, selenium, and phosphorus. Free-range chicken also contains some zinc, iron, magnesium, potassium, and B vitamins.

Consuming free-range chicken as part of a balanced diet supports overall health. The high-quality protein helps preserve muscle mass, while the vitamins and minerals support processes like metabolism, bone health, immune function, and energy production.

With its stellar nutrition profile, free-range chicken from Harriston, Ontario is a smart choice for health-conscious consumers looking to add more lean protein and essential nutrients to their diet.